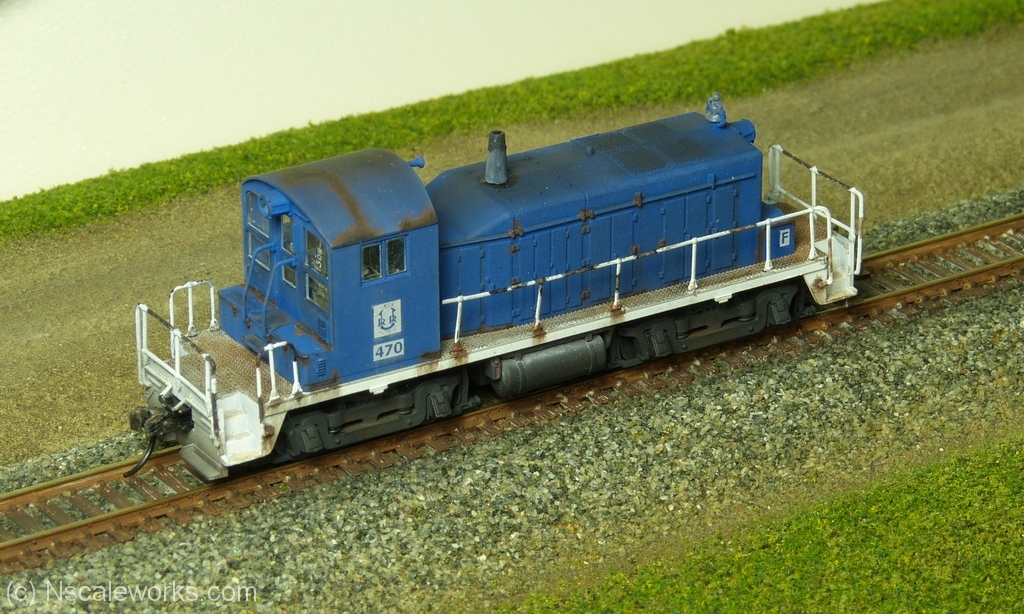
Today I have a little pictorial of making the URR #470
Base unit for this rather short job is an Arnold Hornby SW1 that came with Boston & Maine livery. Not much off the later final livery but I always strip the whole factory paint using 99% IPA and a ultrasonic bath.
I let the disassembled parts sit in the IPA until the paint peels of, followed by a gently rubbing with soft brush. In this case I noticed that the window inserts were glued to the cab walls. Prying them off is a bad idea as you will damage the small window frames. I let them in place and the IPA solved the glue.
Before the works begin : The factory livery on the SW1
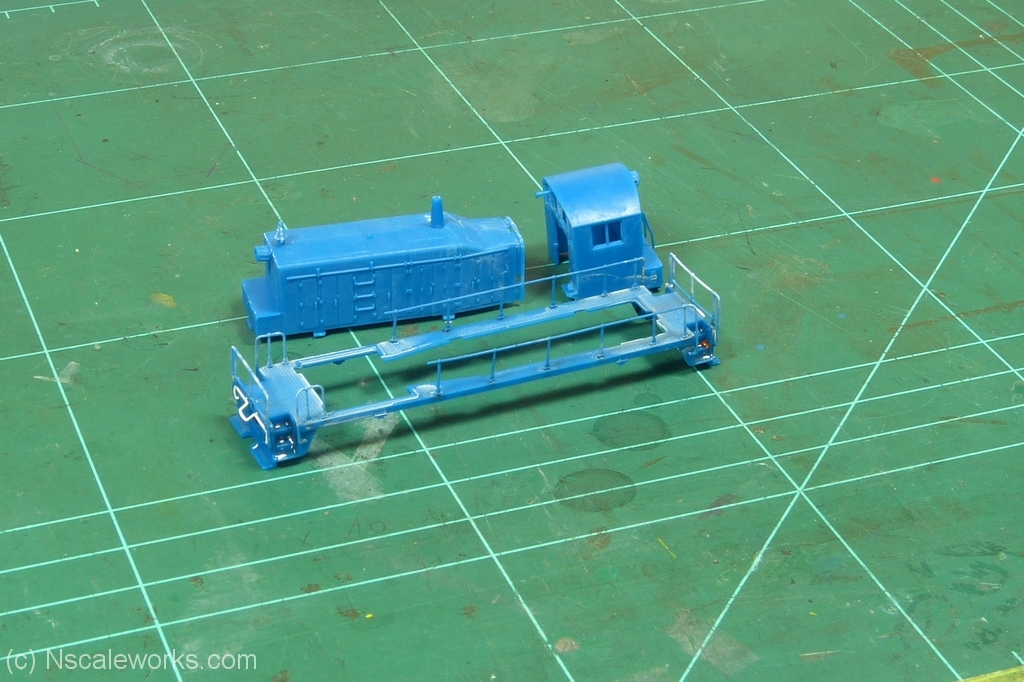
SW1 with stripped off paint.
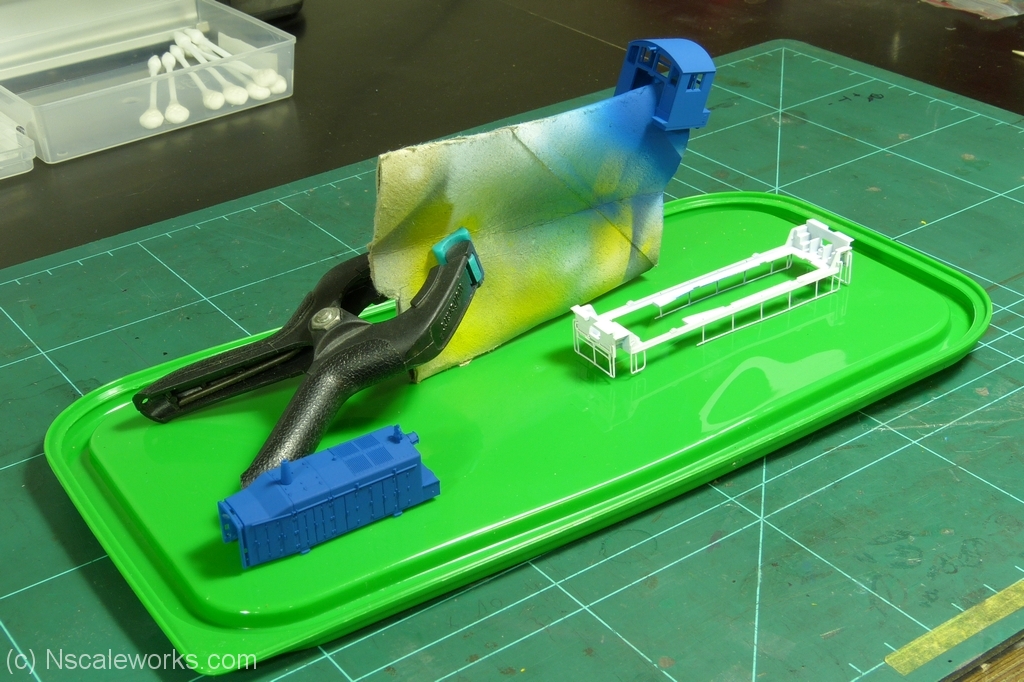
After striping I paint the base part in a straight white and gave the hood an cab a dark blue coat. I use standard water based flat acrylic paints thinned with 70% IPA to flow trough my airbrush.
The spots where I need to place decals I spray a glossy overcoat. This helps the decals to almost disappear on the model as you will have no airbubbles between the decal and the surface of the model.
After the decals dried I overspray the whole parts with a flat clearcoat, to secure the decals and to have an even and base were my weathering will adhere to.
Paint job done. I let the newly painted models or parts of it sit in an upside down placed fresh-box to prevent dust to settle on the fresh paint.
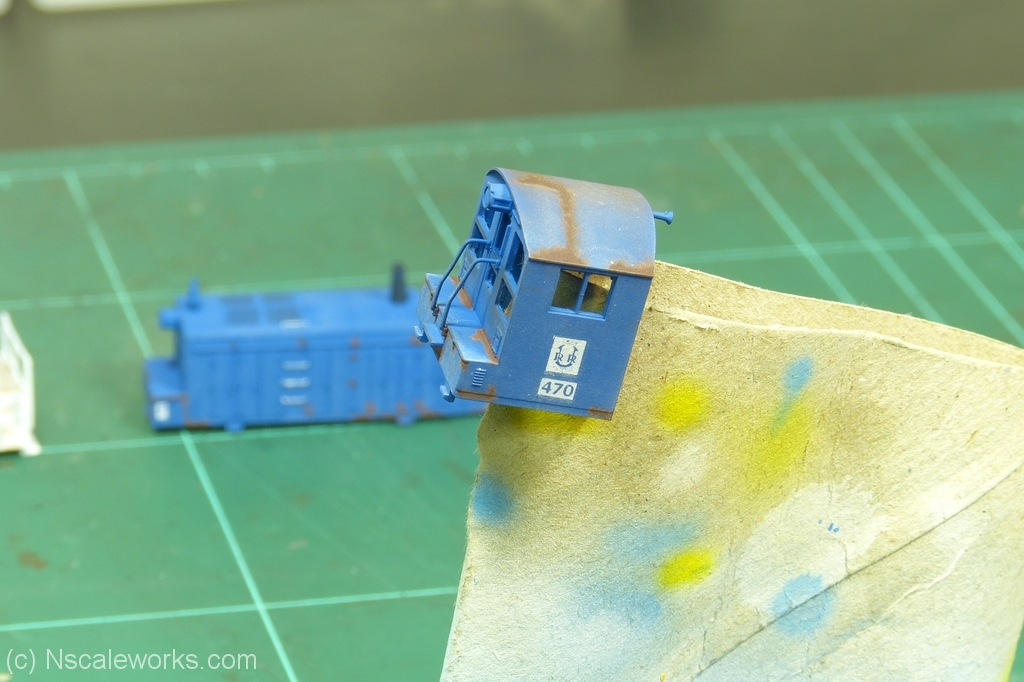
Decals are in place and the weathering has started.
First step in every weathering process is the blurring of the base color. I did this on the SW1 with a light blue – more sky or baby-blue wash of watered acrylic paint. Several layers applied one after one will sum up and help to control the blurring effect better than using just one single layer of wash.
Rust spots and bleeds are made of up to 7 layers of powdered pastels, each layer secured by overspraying with clearcoat.
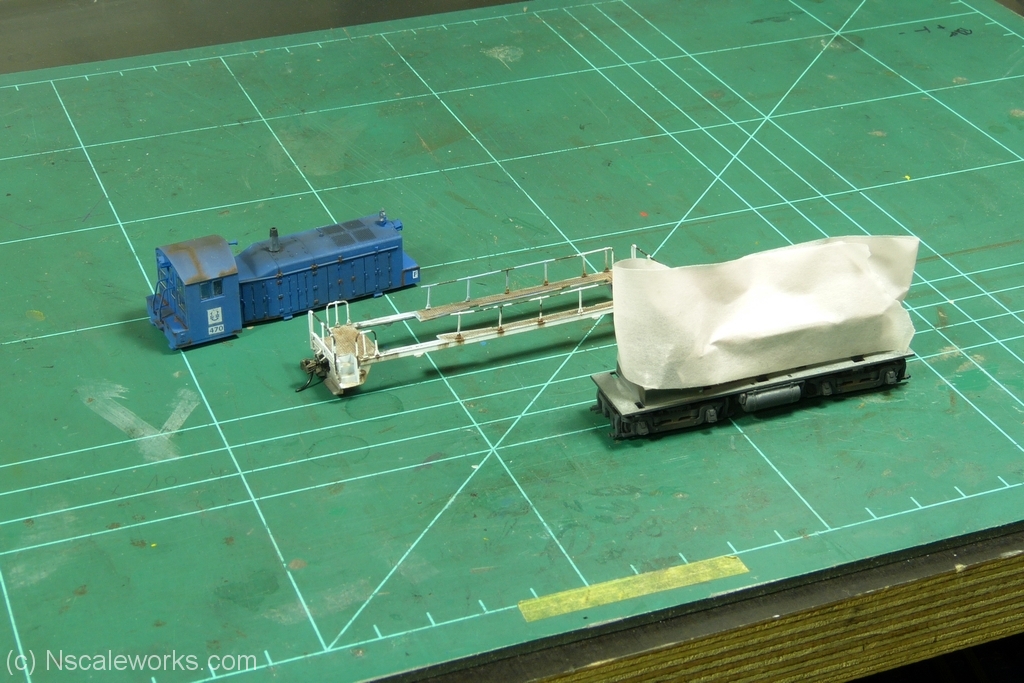
Almost there. Assembly of hood and cab walkways and motor drive.
It helps to work after a prototype photo to not overkill a weathering job.
With all parts weathered I gave them a final flat clearcoat to get the surface touch-safe. After this its time to re-assemble the parts. Before inserting the windows I inspect and clean them if necessary.